


Each year choosing advent calendars is a big decision in our home. In years past we have done Lego, LOL, fidget, chocolate, etc, and they have always been well-liked, but I wanted to do something different this year. In early October, I attended a Women’s Empowerment retreat through my work and my favorite activity was a box filled with affirmations that we all took away from the event. That weekend I knew that I wanted to do something similar for our kiddos.
I will be honest, when I explained it to them, they were NOT HAPPY. They wanted their toy or treat calendars, not some silly thing that Mom insisted would be “really fun”. I said we can try this one time, and maybe we will go back to the other kind next year.
I’m going to share with you the steps I took to make these advent calendars, in case someone else out there is looking for something new or different for their kids.
I decided to do a punch-cup affirmations advent calendar and included a Hershey’s kiss for each day. The kiddo will be able to “punch” the cup and get their affirmation card and a “sweet kiss” each morning to start their day. I ended up also getting a great deal on some miny squishies online so I put one in 50% of the cups for a fun extra surprise. On Christmas, they will each have 25 affirmation cards for a small deck and I got them a card box to keep them in their rooms for those days when they need a little emotional boost.
I have 2 tween daughters, so we did 2 advent calendars.
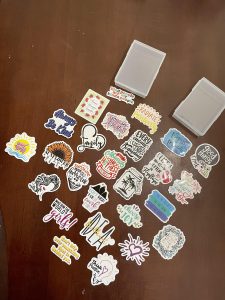
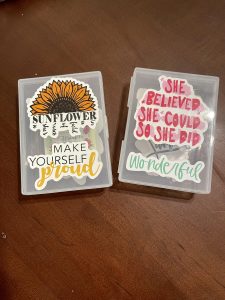
We started out by having them choose positive message stickers to go on the card boxes. I laid out a variety of stickers and they chose messages that resonated with them and decorated the outsides of their boxes.
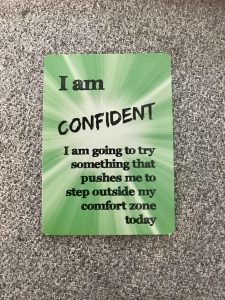
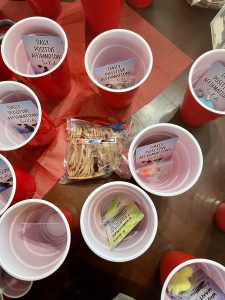
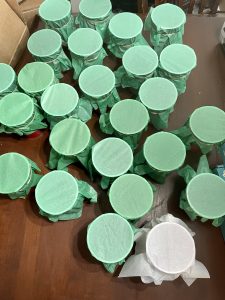
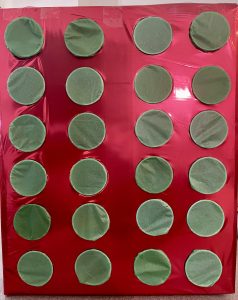
Then, I filled the cups – one card and candy per cup, and half of them got the squishies. We cut the tissue into quarters and covered the cups, securing them with a rubber band. (We used green for one kiddo and red for the other. You will see my colors change in these photos for no reason other than I just forgot to take a picture of the red and did green instead.) I am also showing you what one of the cards looks like to give you an idea of the message.

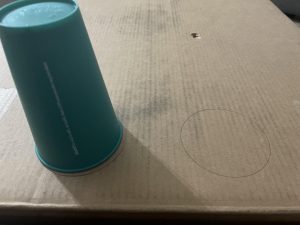
Once they were all ready, we started work on the box. I had a large box saved from a recent purchase and it was perfect. We spaced the holes using a cup, and my patient husband cut out 48 spots. He also wrapped the box in some beautiful foil wrap we had at home to give it a little extra pizzazz. Then the cups were put into their spots, where they will be waiting for our excited children. I had enough cards to do 27 each so they will get 2 in their decks to start this week, then they will open 25 cups.
When it’s time to open, I will remind them that these are called “punch cups” but that we don’t need to take that literally and they can just poke holes to open them so they don’t ruin the cards. 😉 (Oh, and they are SO EXCITED for them now that they understand!)
Everything I purchased came from my local big box store or from an online retailer. In the past, we spend upwards of $30 per calendar, and I tried to keep it down from that this year. All in all, I ended up spending $45 total, which included the cups, tissue, rubber bands, squishies, cards, stickers, chocolates, and card boxes. I split up the squishies and stickers which will also go into their gifts for their friends, and the box and wrapping paper were from home. (Note: I did not use a full package of the tissue shown here, so we have plenty left for wrapping Christmas gifts.)
This could easily be adapted to many things – 24 days or 12 days, treats or small trinkets of any variety or any budget, etc. If you decide to give this a try, please leave a comment – I’d love to see what you came up with!
I am not a “Pinterest Mom”, so this was a little outside of my comfort zone. If I can do it, anyone can!
Looking for the perfect tree? Check out our Christmas Tree Farm Round Up


